
Michael Adeniran is the CEO of Pressure King Inc. He has been dealing in commercial cleaning equipment for many years. He is one of the leading specialists and experts in commercial cleaning products.


The Karcher pressure washer wand requires disassembly when it develops operational problems, such as leaking, decreased power delivery, or clogging issues. A basic DIY approach to dismantling your Karcher wand enables you to enhance its functionality, as well as pressure delivery and extend its operational lifespan.
The ability to disassemble Karcher pressure washer wands empowers you to resolve maintenance problems while protecting you from expensive system changes. The complete guide shows you a secure method to disassemble Karcher wands for upkeep operations.
If you’re wondering how to disassemble pressure washer wand, the process requires caution and proper preparation to avoid injury or damaging internal components.
Your first requirement for the work includes proper equipment and knowledge of your wand’s structure and a basic understanding of the wand’s structure. Proper planning of disassembly procedures leads to operational efficiency and smooth functioning.
Tools and Supplies You’ll Need
Preferably, set up your workspace and get your essential tools before disassembling a Karcher pressure washer wand. Proper equipment enhances the disassembly process while protecting your sensitive system elements during the operation.
Essential Tools:
- The adjustable wrench functions for releasing tight connectors and fittings.
- A Phillips screwdriver serves to unfasten the housing screws.
- A flathead screwdriver provides the tool necessary to open the plastic casing gently.
- The needle-nose pliers function best for small interlocking parts such as springs or O-rings.
- A soft cleaning brush enables users to eliminate debris and dirt from narrow parts.
- Silicone grease functions as an optional lubricating element for O-rings that helps during reassembly.
Additional Supplies:
- The clean microfiber towel functions as a drying material to maintain a germ-free working area.
- O-ring and seal replacements for cases where the originals become worn or damaged.
- Protective gloves and safety glasses for safe handling and protection against debris or residue.
Having these tools ready will save you time and make the process of disassembling your pressure washer wand much smoother.
Understanding the Karcher Pressure Washer Wand
-
-
-
-
-
-
-
-


To properly disassemble a Karcher pressure washer wand, it helps to understand the wand’s key components and how they work together to control water flow and pressure.
Key Parts of the Wand:
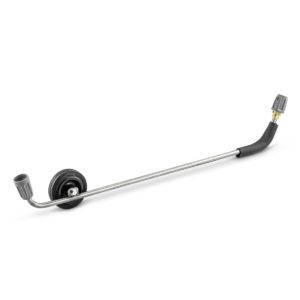
A Karcher pressure washer wand consists of:
- Trigger Handle: This is where the user initiates water flow. Inside, you’ll find a valve mechanism and sometimes a spring-loaded safety lock.
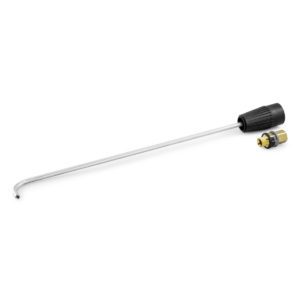
- Lance (Extension Wand): The long tube that extends the wand and allows for easy reach. This can sometimes be a separate attachment depending on the model.
- Nozzle Connector: Located at the tip, this connects the spray nozzle to the wand and often includes a screen filter to block debris.
- Internal Valve System: Found inside the trigger handle, this controls water flow when the trigger is pulled or released.
- O-Rings & Seals: Small rubber components that prevent leaks at connection points.
Types of Karcher Wands:
- Standard Wand: Typically found in residential models.
- Quick Connect Wand: Offers fast attachment and detachment of accessories.
- Telescoping Wand: Designed for high-reach tasks like second-story cleaning.
The wand type you possess lets you determine proper disassembly methods to preserve all parts during the process. The configuration of each wand differs from model to model, which is why you must follow your user manual reference diagrams whenever unsure.
Preparation Before Disassembly
Understanding how to remove pressure washer wand is essential for cleaning or replacing components. A proper preparation process during the disassembly of your Karcher pressure washer wand will create smooth, safe, and effective results. Skipping these steps would cause water damage, injuries, and potential internal parts.
1. Power Down and Disconnect Everything
- When the operation is complete, disconnect the power source and then switch off the pressure washer.
- Remove the wand by disconnecting it from the trigger gun, which is attached to the hose.
- When your pressure system has a gas-powered engine, you should first turn off the engine and then wait for it to cool down.
2. Drain Residual Water
- Press the trigger while pointing your wand downward to drain all pressure along with remaining water.
- To prevent spills during disassembly, you should empty all moisture from inside the hose and wand.
3. Set Up a Clean Workspace
- Use a smooth surface area that has sufficient illumination.
- Place a towel or mat on the workspace to maintain part organization while stopping small components from moving astray.
4. Take Note of Wand Orientation
- Record several pictures or video footage of the wand as a preparation step before starting disassembly.
- The documentation of wand orientation before disassembly will help achieve precise reassembly of the Karcher pressure washer wand.
The steps you execute before beginning work decrease mistakes while safeguarding your equipment and creating conditions for safe operation.
Step-by-Step Guide: How To Disassemble A Karcher Pressure Washer Wand

The process of removing Karcher pressure washer wand sections is not complicated. The right set of tools alongside some patience enables you to disassemble your wand for cleaning or to replace O-rings and solve problems regarding reduced pressure and leaks. You can successfully disassemble your Karcher pressure washer wand by following this accurate procedure.
If you need to know how to disassemble a Karcher pressure washer wand, follow these safe steps:
Step 1: Detach the Wand from the Trigger Gun
Start your disassembly process by first removing the wand from the pressure washer’s trigger gun. Gently pull the wand free from the handle by pressing the collar located at the base of the Quick Connect model. A threaded wand requires counterclockwise hand rotation, but using an adjustable wrench helps with disconnection when the threads are hard to loosen. Carefully remove locking clips and retaining pins from the equipment using pliers, since these components might be included with some models.
Step 2: Remove the Lance (Extension Wand)
If your model has an extension lance attached to the spray wand:
- Unlock the extension by twisting it counterclockwise or pressing the quick-release mechanism.
- Pull the lance apart from the wand. Inspect for any visible dirt or obstructions inside the tube.
Step 3: Open the Trigger Housing (If Applicable)
The trigger handle housing needs opening for inspection when the pressure wand demonstrates internal faults, such as trigger blocks or water flow reduction. A screwdriver enables you to remove all screws visible in the casing. A user should carefully separate the plastic housing to access its internal elements. You will find the trigger lever and spring-loaded valve within the chamber, along with possible safety lock features in certain models. If your trigger handle leaks or fails to build pressure, you may need a replacement Karcher gun.
Step 4: Disassemble the Nozzle Connector
If you’re asking how to remove nozzle from Karcher pressure washer, the method depends on the attachment type. The nozzle connector is a common area where blockages occur, especially if your water supply contains sediment or hard minerals.
- Twist off the spray nozzle or use pliers if it’s stuck.
- Check for a mesh screen filter, remove and clean it thoroughly with water.
- Use a toothpick or fine needle to clear any debris lodged inside the connector.
Step 5: Remove and Inspect O-Rings and Seals
O-rings are small but critical. A worn or cracked O-ring can cause serious leakage or pressure loss.
- Use needle-nose pliers or a plastic pick to gently pull out the O-rings.
- Inspect each O-ring for:
- Cracking or splitting
- Flat spots or warping
- Discoloration (a sign of wear or chemical damage)
- Replace damaged O-rings with exact matches (check your model specs for sizing).
Step 6: Clean and Lubricate All Moving Parts
After you inspect all main parts of the Karcher pressure washer wand, perform comprehensive cleaning operations. Clean all surfaces on the Karcher pressure washer wand with a fresh microfiber towel to remove dirt, buildup, and moisture residue. Identification of scale or mineral deposits requires a descaling solution that should be applied weakly to reestablish cleanliness.
Once everything is dry, apply a small amount of silicone-based lubricant to moving components such as O-rings, valve parts, and the trigger mechanism. Avoid petroleum-based products, as they can degrade rubber components and shorten the lifespan of your pressure washer wand.
Not sure which wand fits your pressure washer or cleaning needs? Check out our Pressure Washer Wand Buyer Guide for expert tips on choosing the right size, spray angle, and compatibility. From tackling light home cleaning or heavy-duty commercial jobs, this guide helps you make an informed choice and get the best performance out of your machine!
Common Issues Found During Disassembly

Disassembling your Karcher pressure washer wand can reveal a range of internal issues that may not be visible from the outside. Understanding these common problems can help you identify what needs repair or replacement to restore full functionality.
When searching for Karcher K4 repair, common issues include:
- Worn-out O-rings or seals: A frequent cause of leaks in your Karcher pressure washer wand, worn O-rings result in reduced water pressure and spray inconsistencies. During disassembly, inspect for cracks, flattening, or dry rot.
- Clogged nozzle or wand tubes: Dirt, sediment, and mineral buildup can block water flow, causing low or erratic pressure. If your pressure seems off, a deep clean of the nozzle and inner tubing is likely needed.
- Stuck or stiff trigger mechanism: Rust or lack of lubrication can lead to a trigger that won’t move smoothly. Disassembling the trigger handle and cleaning/lubricating its components helps restore proper functionality.
- Cracked or corroded plastic parts: Exposure to the elements over time may weaken or damage plastic components inside the wand. These should be identified during disassembly and replaced to prevent failures during use.
If your Karcher pressure washer wand stuck, don’t force it. Prevent future sticking by lubricating O-rings regularly.
Pressure Washer Wand Repair: DIY vs Professional
If you’re considering pressure washer wand repair, evaluate the issue first.
DIY Repairs:
- Replacing O-rings
- Cleaning clogged nozzles
- Tightening loose fittings
Professional Repairs:
- Cracked internal housing
- Severe leaks
- Broken locking mechanisms
Small repairs are inexpensive, but structural damage may require full replacement. Additionally, if you’re researching how to take fogger vape apart, understand that most disposable vape devices are not designed for disassembly.
Conclusion
Disassembling your Karcher pressure washer wand may seem intimidating at first, but with the right steps and a little patience, it becomes a straightforward process that can save you time, money, and frustration. From removing the nozzle and inspecting O-rings to deep cleaning internal components and reassembling with care, each step plays a vital role in keeping your pressure washer in peak condition.
Whether you’re troubleshooting issues like low pressure, leaks, or a jammed trigger, taking apart and cleaning your Karcher wand helps you spot and solve problems early. Understanding how to disassemble a Karcher pressure washer wand empowers you to take control of your machine’s performance and ensures you get the high-pressure cleaning power you expect, every time.
Frequently Asked Questions (FAQs)
How to remove wand from Karcher pressure washer?
To remove the wand from a Karcher pressure washer, first turn off the unit and release any pressure by squeezing the trigger. For quick-connect models, pull back the collar on the connector and slide the wand out. For threaded models, simply unscrew the wand from the trigger gun.
Why is my Karcher pressure washer wand leaking?
A leaking Karcher wand is often caused by worn or damaged O-rings, loose fittings, or cracks in the wand or nozzle housing. Disassemble the wand to inspect and replace faulty parts, especially the seals and connectors.
Can I clean the inside of a Karcher pressure washer wand?
Yes, you can clean the inside of the wand by disassembling it and flushing out debris with warm water and a small brush. This removes mineral buildup and improves pressure performance.
How often should I maintain my Karcher pressure washer wand?
For best results, flush the wand after each use and fully disassemble it for deep cleaning every few months—especially if you use it frequently or with detergents.
What tools do I need to disassemble a Karcher pressure washer wand?
Typically, you’ll need a flathead screwdriver, adjustable wrench, pliers, and a soft brush. Silicone grease and replacement O-rings are also recommended for reassembly.